Walking on Stepmill, also known as stair climber walking or rotating stair walking, is a cardio and lower body strength exercise that feels like climbing an endless flight of stairs. Because each step asks you to lift and drive through the hip, knee, and ankle, this movement is a true compound pattern that challenges the legs and core while raising your heart rate.
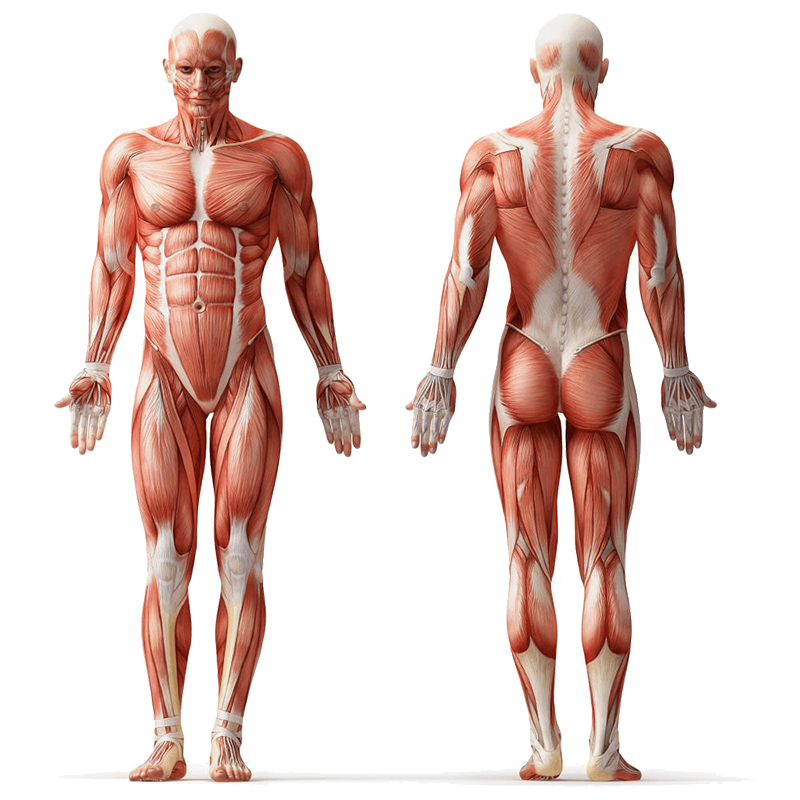
Expect your Quads, Hamstrings, Glutes, and Calves to do most of the work, with your Core and Obliques helping to stabilize your torso. You only need a stepmill or stair climber machine to get started, and the difficulty can be dialed from beginner friendly to advanced by adjusting speed, step height, and workout duration. If you want time efficient conditioning that also builds functional leg endurance for daily life, this is a smart pick.
What sets stepmill walking apart is the natural gait pattern. Unlike pedal steppers, a stepmill uses rotating, full stairs. That means a longer range of motion at the hips and knees, which often translates to better Glute activation and a stronger carryover to real world stair climbing. It is also relatively low impact compared with running, making it a useful option for building cardiovascular fitness while being kind to the joints when performed with good posture and appropriate intensity. Whether you are a beginner learning to pace your breathing or a seasoned athlete chasing a high calorie burn, the stepmill can match your goals.
Safety Considerations
Before you step on and start climbing, a few smart precautions will help you train hard and feel great afterward.
- Warm up with 3 to 5 minutes of easy pedaling on a bike or brisk treadmill walking to elevate body temperature and prepare your Hips, Quads, and Calves.
- Check the machine. Make sure the emergency stop works, the steps rotate smoothly, and the handrails are dry and secure.
- Footwear matters. Choose supportive athletic shoes with good traction to reduce slip risk and improve force transfer through the forefoot and midfoot.
- Posture first. Stand tall with ribs stacked over pelvis, keep your gaze forward, and engage your Abdominals to avoid excessive low back sway.
- Progress gradually. Start with slower speeds and shorter sessions, then add time or intensity as conditioning improves.
- Manage joint comfort. If you feel knee pressure, shorten your step depth slightly, slow the pace, and keep your knee tracking in line with your second toe.
Note: Consult a fitness professional or healthcare provider if you have pre-existing conditions or experience discomfort during the exercise.
Step-by-Step Instructions
Use these steps to lock in solid technique from your very first climb.
- Set the machine: Stand on the side rails first. Select a very low speed so the stairs move slowly when you begin. Place both feet on two different steps at mid height rather than the lowest step to prevent a sudden drop when it starts.
- Find your stance: Stand tall with your feet about hip width apart. Lightly rest your fingertips on the handrails for balance without leaning your bodyweight into your arms.
- Start stepping: Lead with one foot to the next step, then drive through your whole foot as you lift your body up. Alternate legs in a smooth rhythm. Let your heel make contact and push through to your forefoot for a natural roll.
- Breathe steadily: Inhale through the nose for one to two steps and exhale through the mouth for one to two steps. Keep the breath continuous to support pacing and core stability.
- Maintain alignment: Keep your chest proud, shoulders relaxed, and eyes forward. Your knees should track over the middle toes. Avoid crossing steps until you are comfortable with basic technique.
- Adjust intensity: Once you feel stable, raise the speed gradually or increase duration. Beginners might start with 5 to 10 minutes. Intermediate climbers can aim for 15 to 25 minutes, and advanced sessions may extend longer or use intervals.
- Finish safely: Reduce speed for the final 1 to 2 minutes. When the steps slow to a near stop, place your feet on the side rails, press stop, and step down carefully.
Tips for Proper Form
Small technique tweaks make a big difference in comfort and results.
- Stand tall rather than hinging at the waist. A vertical torso lets your Glutes and Quads contribute more while sparing the lower back.
- Use a light rail touch. Think two fingers per hand for balance. If your grip is tight or your elbows are locked, you are offloading work from the legs.
- Drive through the whole foot. Feel the heel contact, then push through the forefoot to extend the ankle and activate the Calves.
- Choose controlled step depth. Very deep steps can stress the knees. Aim for a comfortable bend where the knee tracks over the foot.
- Keep cadence smooth. Short, choppy steps tend to cause hunching. A steady, rhythmic climb improves breathing and efficiency.
- Engage the Core. Lightly brace your Abdominals and Obliques to reduce trunk sway and keep balance as the stairs rotate.
- Look forward. Your spine follows your eyes. Looking down invites rounded shoulders and neck strain.
- Program intervals wisely. Use work periods of 30 to 90 seconds with equal recovery for a time efficient conditioning session.
Common Mistakes to Avoid
Dodging these pitfalls keeps the focus on the right muscles and protects your joints.
- Leaning on the rails: Hanging your bodyweight on the handrails reduces leg demand and can irritate shoulders and wrists.
- Hunching forward: Rounded posture limits lung expansion and can strain the neck and upper Back. Keep ribs stacked and shoulder blades gently set.
- Overstriding: Taking steps that are too deep may increase knee stress. Use a moderate depth that lets your knee align over your toes.
- Toe only stepping: Staying on the forefoot the entire time can fatigue the Calves and Achilles. Let the heel touch down for a stronger, safer push.
- Going too fast too soon: High speeds can break rhythm and raise fall risk. Master control first, then add speed or time.
- Looking down at the steps: Constantly looking down disrupts balance. Keep your eyes ahead and trust your foot placement.
- Skipping the cool down: Hopping off abruptly can leave you lightheaded. Always step down after a slow, easy finish.
Primary Benefits
Climbing builds more than a sweat. Here is what you can expect when you train consistently.
- Cardiovascular fitness: Continuous stepping elevates heart rate and supports improvements in aerobic capacity.
- Leg strength and endurance: Stronger Quads, Hamstrings, and Glutes from repeated hip and knee extension, plus Calf development from ankle push off.
- Core stability: Your Abdominals and Obliques work to keep the torso stable with each step, which can improve posture and balance.
- High calorie burn in little time: Large muscle groups working together typically increase energy demand for efficient sessions.
- Functional carryover: Better ease with daily stairs, hiking, and tasks that require sustained lower body effort.
- Low impact conditioning: Compared with running, stepmill walking often produces less joint impact when posture and step depth are controlled.
- Scalable intensity: Simple speed and duration changes let beginners and advanced users train on the same machine.
Regressions
Dial the challenge down while keeping technique crisp with these beginner friendly options.
- Short sessions at very low speed, such as 5 minutes at an easy, conversational pace.
- Alternate 30 seconds on and 30 to 60 seconds off the machine for active recovery and skill practice.
- Use the handrails lightly during the first few workouts to steady balance while you learn cadence.
- Shallow steps that keep knee bend moderate to reduce anterior knee stress.
- Step and pause pattern, where you place a foot, stand tall, breathe, then take the next step.
- RPE based training, staying around 4 to 5 out of 10 perceived exertion for most of the session.
- Time caps, such as two or three 3 minute blocks with 1 to 2 minutes of rest between blocks.
Progressions
Ready to push harder while staying smooth and safe. Try these variations to level up.
- Speed increases in small jumps while keeping posture upright and rail contact minimal.
- Intervals such as 60 seconds hard, 60 seconds easy repeated for 10 to 20 minutes.
- Step height emphasis, focusing on a slightly deeper step for Glute and Hamstring demand while preserving alignment.
- Side stepping sets. Turn slightly and step laterally for short bouts to challenge the Lateral Delts stabilizers and Obliques along with Hips. Use rails as needed for balance.
- Backward stepping in short intervals to emphasize Glutes and Hamstrings. Move slowly and prioritize safety.
- Loaded climbs with a light weighted vest if cleared for use, keeping speed moderate and posture tall.
- Tempo control, counting three seconds up and one second down to build muscular endurance.
Summary
Walking on the stepmill is a scalable, low impact cardio and leg strengthening exercise that simulates real stairs for a natural gait and strong carryover to daily life. With an upright posture, light rail contact, and smooth foot roll from heel to forefoot, it targets the Quads, Hamstrings, Glutes, and Calves while the Core stabilizes every step. Start slow, build time and speed gradually, and use regressions or progressions to match your conditioning. Done consistently, it can boost cardiovascular health, leg endurance, and balance while fitting easily into a busy routine.
FAQs
These quick answers clear up common questions so you can climb with confidence.
Is walking on a stepmill good for beginners?
Yes. Start with slow speeds and short sessions, keep posture tall, and use the handrails lightly for balance until you feel stable.
Which muscles does the stepmill work most?
Primarily the Quads, Hamstrings, Glutes, and Calves. Your Abdominals and Obliques help stabilize the torso, and the Erector Spinae support posture.
How long should I use the stepmill per workout?
Beginners can aim for 5 to 10 minutes. Intermediates often progress to 15 to 25 minutes. Adjust based on fitness level and goals.
Should I hold the handrails?
Use fingertips lightly for balance, but avoid leaning. Too much support reduces leg work and can encourage poor posture.
Can it bother the knees?
If step depth is too deep or speed too fast, knees may feel stressed. Shorten your step, slow down, and keep your knee tracking over the second toe.
Is stepmill walking better than a pedal stepper?
They are different. A stepmill uses rotating stairs with a fuller range of motion that often feels more like real stair climbing and may engage the Glutes more.
How often can I include it in my routine?
Two to four times per week works well for most people, leaving rest days for recovery or other training like strength work and mobility.