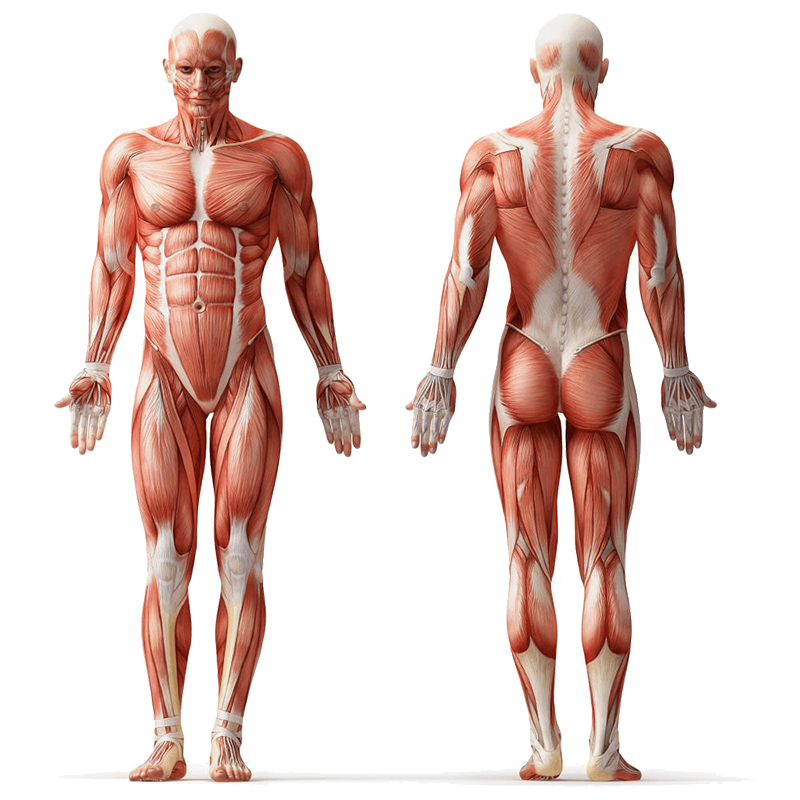
The kneeling hip thrust, also known as the tall kneeling hip thrust or kneeling glute thrust, is a strength exercise that blends simple setup with powerful hip extension. Performed from a tall kneeling stance, it focuses on driving the hips forward to a fully extended position, which puts the spotlight on your Glutes while the Core and Obliques stabilize your trunk. Although it is primarily a bodyweight move, you can hold a dumbbell, kettlebell, or loop a resistance band around your hips to increase the challenge.
Because the range of motion is controlled and the spine stays neutral, this movement suits beginners who are learning to hinge, as well as intermediate lifters who want intense glute work without heavy loading. It functions like an isolation exercise for the hip joint, yet it still recruits support from the Hamstrings, Quads, Erector Spinae, and even the Hip Flexors as antagonists that lengthen during extension. Expect a straightforward setup, a clear mind-muscle connection, and a glute burn that transfers well to squats, deadlifts, and everyday activities like standing up, climbing stairs, and carrying groceries.
Safety Considerations
Before you start, set yourself up for success with a few smart precautions that keep your knees, hips, and lower back happy.
- Use a soft surface for your knees. A folded exercise mat or pad reduces pressure on the kneecaps and allows you to focus on your hips.
- Warm up with light hip mobility. Try 1 to 2 minutes of glute bridges, hip circles, or dynamic quad stretches to prepare the joint for extension.
- Keep your spine neutral. Think long from crown of head to tailbone and avoid overarching the lower back as you lock out the hips.
- Brace your Core and Abdominals gently. A 3 out of 10 brace gives you stability without holding your breath.
- Place your knees about hip width. This stance helps the Hip Adductors and Tensor Fasciae Latae stay balanced while your Glutes do the work.
- Add load only after you can complete slow, controlled reps with bodyweight.
Note: Consult a fitness professional or healthcare provider if you have pre-existing conditions or experience discomfort during the exercise.
Step-by-Step Instructions
Use the following walkthrough to groove perfect reps from your first attempt.
- Set your start position on the heels. Kneel on a padded mat with knees hip width and toes pointed back. Sit your hips gently onto your heels while keeping your torso tall and ribs stacked over the pelvis. Hold your hands in front of your chest. If loading, hug a dumbbell or kettlebell to your chest, or loop a light resistance band behind you and across the front of the hips.
- Create a light brace. Inhale through the nose, draw the belly in slightly, and set your Core and Obliques so your spine stays neutral. Keep your gaze forward and shoulders relaxed.
- Drive the hips forward to tall kneeling. Exhale as you squeeze your Glutes and press the hips forward, rising from the heels until your body forms a straight line from head to knees. Knees stay planted and shins stay relaxed on the floor.
- Finish with control. At the top, fully extend the hips without leaning back. Keep the ribs down, glutes tight, and Erector Spinae quiet so you do not arch the lower back.
- Return to the start. Inhale as you sit the hips back toward the heels under control. Maintain your tall posture and neutral spine while you lower.
- Repeat for your set. Perform 8 to 15 smooth reps. Briefly pause at the top to feel the glute squeeze, then lower with a steady 2 to 3 second descent.
Tips for Proper Form
Dial in these cues to maximize glute activation and keep stress off the knees and lower back.
- Think hips, not back. The motion is a hip hinge that moves your pelvis forward and back while the spine stays quiet.
- Keep the chin level. A neutral head position helps maintain alignment from neck to hips and prevents rib flare.
- Squeeze the Glutes first. Start the return from the bottom by initiating with your Glutes rather than pushing the thighs forward.
- Use a light core brace. A gentle brace stabilizes the Erector Spinae so the lower back does not arch at lockout.
- Control the eccentric. Lower for 2 to 3 seconds to feel the stretch through Hip Flexors and to build time under tension.
- Adjust knee width. If you feel pressure in the knees or hips, experiment with slightly wider or narrower spacing.
- Load close to your center. When using a dumbbell, keep it hugged to the chest to prevent unwanted leaning.
- Breathe with intent. Inhale on the way back, exhale as you drive to tall kneeling to reinforce core stability.
Common Mistakes to Avoid
These pitfalls are easy to sidestep once you know what to look for.
- Overarching the lower back. Flaring the ribs at the top shifts load from Glutes to lumbar spine. Keep the ribs stacked and glutes squeezed.
- Leaning the torso forward. Pitching forward turns the move into a partial squat. Keep the chest tall and hips as the prime mover.
- Driving from the quads. Jamming the knees forward reduces glute work. Cue a glute squeeze to push the hips forward first.
- Rushing the bottom position. Skipping the stretch phase limits range. Pause briefly at the deepest comfortable point without collapsing.
- Feet digging into the floor. Tensing the toes or pushing through the shoelaces can alter mechanics. Keep feet relaxed and focus on the hips.
- Loading too soon. Adding heavy weight before mastering control can irritate knees or back. Own bodyweight first, then progress.
- Knees collapsing inward. Allowing valgus collapse reduces stability. Keep knees in line with hips and squeeze the glutes.
Primary Benefits
This move offers big returns for a small setup. Here is what you gain from consistent practice.
- Targeted glute development. Emphasizes Gluteus Maximus with support from Gluteus Medius and Minimus for shape, strength, and power.
- Lower back friendly hip training. Neutral spine and kneeling position keep stress off the lumbar area compared with heavy barbell thrusts.
- Improved hip extension mechanics. Trains clean hip lockout for stronger squats, deadlifts, lunges, and daily standing tasks.
- Hip flexor mobility stimulus. The controlled backward hinge places Hip Flexors on stretch while you strengthen the opposing Glutes.
- Core stability boost. Abdominals, Obliques, and Erector Spinae work to resist arching and maintain posture.
- Knee comfort option. With proper padding and vertical shins, many people find less knee stress than in deep squats.
- Minimal equipment and space. Works in small spaces with bodyweight or simple tools like a dumbbell or band.
Regressions
If you are new to hip hinging or prefer a gentler option, try one of these easier variations.
- Hands-assisted kneeling hip thrust. Lightly press fingertips on a bench or box to help balance while you learn the motion.
- Reduced range kneeling thrust. Move through a smaller arc, stopping before deep stretch, and expand gradually as control improves.
- Isometric tall-kneeling hold. Hold the top position for 20 to 30 seconds while bracing the core and squeezing the Glutes.
- Band anchored behind hips. Use a very light band secured behind you for gentle resistance that guides the forward drive.
- Hip bridge on the floor. Practice classic glute bridges to groove hip extension with full foot contact before kneeling variants.
- Padded double-mat setup. Extra cushioning allows you to focus on mechanics without knee discomfort.
Progressions
When bodyweight reps feel easy and crisp, level up with these challenges.
- Weighted kneeling hip thrust. Hug a dumbbell or kettlebell to your chest for added load.
- Band plus weight combo. Loop a medium band across the hips while also holding a weight to increase peak tension at lockout.
- Tempo repetitions. Lower for 3 to 5 seconds, pause for 2 seconds at the bottom, and finish with a strong squeeze at the top.
- Single-leg emphasis. Keep both knees down but shift 70 to 80 percent of effort to one side for sets, then switch.
- Half-kneeling hip thrust. Place one foot forward in a lunge stance and drive the hips forward to challenge lateral stability.
- Overhead counterbalance. Hold a light plate or stick at arm’s length in front of you to train anti-extension control.
Summary
The kneeling hip thrust is a simple, joint-friendly way to strengthen the Glutes and improve hip extension. From a tall kneeling stance, you hinge back with control, then drive the hips forward while keeping the spine neutral and the core braced. It suits beginners through intermediate lifters, needs little space or equipment, and carries over to stronger squats, deadlifts, and daily movements. Start with bodyweight to master technique, use padding for comfort, and progress with bands, tempo, or added load for a powerful glute-focused routine.
FAQs
Get quick answers to common questions so you can train with confidence.
What muscles does the kneeling hip thrust work?
The primary focus is the Glutes. Secondary support comes from the Hamstrings, Quads, Core, Obliques, and Erector Spinae, while Hip Flexors lengthen as you extend.
Is this exercise good for beginners?
Yes. The controlled range and neutral spine make it approachable. Start with bodyweight and a thick mat, then add a light band or dumbbell as form improves.
How many sets and reps should I do?
Begin with 2 to 3 sets of 8 to 12 reps. Build to 3 to 4 sets of 10 to 15 reps for muscle growth, resting 45 to 75 seconds between sets.
Where should I feel the movement?
Mostly in the Glutes at the top of the rep. If you feel it in the lower back, reduce the range, brace the core, and avoid leaning backward at lockout.
What equipment works best for loading?
A dumbbell or kettlebell hugged to the chest is simple and effective. Bands increase tension near lockout and pair well with moderate weights.
How does this differ from a barbell hip thrust?
The kneeling version uses a shorter range and a more upright torso, which reduces lower back stress and focuses the effort on glute squeeze rather than heavy loading.
Can I include it on leg day and glute day?
Absolutely. Place it after compounds like squats or deadlifts, or use it first in a glute-focused session as an activation primer.