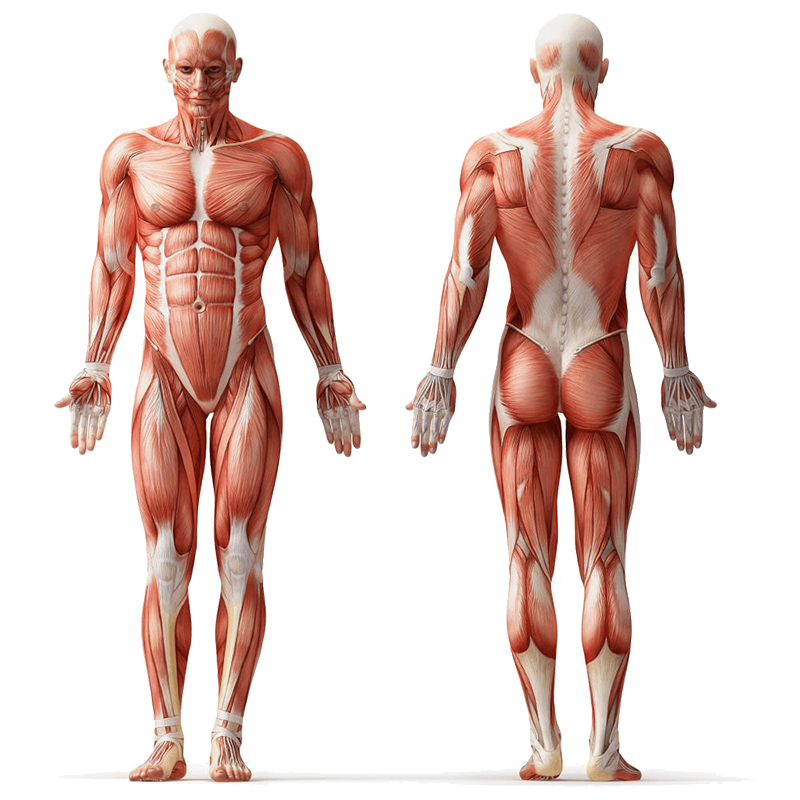
Banded Bicycle Crunches, also known as miniband bicycle crunches, are a dynamic core strength exercise that blends a classic ab movement with constant elastic tension. You will loop a small resistance band around both feet, which makes every rep more controlled and more challenging for the abdominals and obliques. This is a strength exercise with compound mechanics, since the trunk rotates and flexes while the hips extend and flex through a pedaling motion. Expect primary work in the Core, especially the Abdominals (rectus abdominis) and Obliques (external and internal), with help from the Hip Flexors like the iliopsoas and rectus femoris, plus light involvement from the Serratus Anterior and stabilizers in the Hips.
A simple loop band or miniband is all you need, and the difficulty sits nicely in the beginner to intermediate range, depending on band tension and tempo. The band keeps the lower body honest by adding resistance as you extend each leg, which can boost muscle activation compared with bodyweight alone and helps many people maintain steadier form across reps. The bicycle maneuver has long been highlighted as a highly effective choice for training rectus abdominis and the obliques, and the banded variation builds on those strengths by adding external resistance around the feet.
Safety Considerations
Before you get moving, set up your space and your body so your core does the work and your neck and lower back stay happy.
- Choose a light to moderate miniband first. Tension should challenge you without pulling your legs out of alignment. If you are new to the movement, lighter resistance helps you learn the rhythm and rotation.
- Loop the band securely around both feet at the midfoot or just behind the ball of each foot. Double check that the band lies flat and is not twisted so it does not roll or snap during leg extension.
- Use a mat and clear floor space. Support your head with your hands lightly and keep elbows comfortably wide to avoid tugging the neck.
- Keep the lower back gently pressed toward the floor. If the band makes your back arch as you extend the leg, shorten the range or reduce band tension.
- Move slowly at first. The band adds resistance so rushing increases the chance of technique breakdown.
- Stop if you feel sharp pain, pinching in the hip, or neck strain. Regress the movement or adjust tension as needed. Note: Consult a fitness professional or healthcare provider if you have pre-existing conditions or experience discomfort during the exercise.
Step-by-Step Instructions
Set up with intention, then flow through each rep with smooth control and steady breathing.
- Lie on your back on a mat. Loop a small resistance band evenly around both feet so it sits flat at the mid-foot. Bring your hands lightly behind your head with elbows relaxed and open. Lift both feet so knees stack above hips and shins are roughly parallel to the floor. Brace your Core by drawing ribs down and keeping the lower back close to the mat.
- Exhale to engage your Abdominals and Obliques. Curl your shoulder blades off the floor without yanking your head. Think about bringing your rib cage toward your pelvis.
- Begin the bicycle motion: extend your right leg out against the band while you rotate your torso to bring your right underarm toward your left knee. Keep the extended leg straight and the toes flexed so the band stays put. Pause briefly when your rib cage faces the bent knee.
- Inhale as you transition through center. Then exhale and switch sides: extend your left leg against the band and rotate your torso to the right, guiding your left underarm toward your right knee. Move smoothly so the band never goes slack.
- Continue alternating sides in a steady pedaling rhythm. Keep your chin slightly tucked, elbows open, and lower back close to the floor. Aim for time or reps, such as 2 to 3 sets of 8 to 12 controlled reps per side. Rest as needed between sets.
Tips for Proper Form
Small cues make a big difference when the band starts pulling on your legs.
- Lead the twist from your rib cage, not your elbows. Think underarm to knee rather than elbow to knee to reduce neck strain and improve Oblique activation.
- Keep your extended leg straight and active. Push the heel away to maintain band tension and stable Hips throughout the movement.
- Exhale on the twist. Breathing out as you rotate helps brace the Core and flatten the rib cage for better control.
- Adjust the range to protect your lower back. If your back arches, do not extend the leg as far or switch to a lighter band.
- Move slow to medium speed. The band increases resistance so tempo control keeps tension where you want it.
- Place the band evenly on both feet and recheck mid-set if it starts to roll. A flat, even loop lowers the risk of snapping.
Common Mistakes to Avoid
These pitfalls are easy to make when the band gets involved, so watch for them as you train.
- Pulling the head with your hands. Keep fingertips light and elbows open to avoid neck strain.
- Letting the lower back arch off the floor. Shorten your leg extension or pick a lighter band to keep the spine quiet.
- Pedaling too fast. Momentum reduces muscle work and increases band slippage. Slow down for better time under tension.
- Allowing the band to slide toward the toes. Keep it at midfoot and flex the toes up slightly to secure position.
- Twisting from the elbows instead of the trunk. Focus on rotating the rib cage to target the Obliques properly.
- Extending the leg without full knee lockout control. If the knee wobbles, reduce tension and reinforce alignment before increasing speed.
Primary Benefits
Add the band and you get extra challenges for a stronger, smarter core.
- High activation of rectus abdominis and Obliques thanks to the pedaling motion plus trunk rotation.
- Constant lower body tension from the band promotes more controlled leg drive and reduces sloppy reps.
- Scalable difficulty by selecting lighter or heavier bands, adjusting tempo, or changing range of motion.
- Minimal equipment and space needed, making it easy to include in home workouts or travel routines.
- Core endurance and coordination carry over to daily activities that involve rotation and resisted leg movement, such as walking uphill or climbing stairs.
- Opportunity to emphasize breathing mechanics which can improve trunk stiffness and posture during other lifts.
Regressions
If the full banded version feels too intense, dial it back with these accessible options.
- Bodyweight Bicycle Crunches without a band to master the pattern first.
- Hands-to-floor support: lightly press fingertips into the floor beside hips to steady the pelvis as you pedal.
- Short-range leg extensions so the lower back stays close to the mat throughout.
- Dead Bug with band around hands instead of feet to practice core bracing with less hip flexor demand.
- Band-assisted isometrics: hold a bicycle position with one leg extended against a very light band for 10 to 20 seconds per side.
- Crunch with rotation on the floor, keeping both feet planted to focus on trunk movement only.
Progressions
Ready for more challenge and variety? Try one of these progressions.
- Heavier miniband around both feet while keeping the same slow tempo and pristine form.
- Tempo work: 3-second leg extension, 1-second hold, 3-second return to increase time under tension.
- Anti-rotation pause: pause at peak twist for a full breath before switching sides.
- Extended-lever bicycle: reach arms overhead instead of behind the head to raise the lever length.
- Band plus ankle weights for the extended leg if technique is rock solid and the lower back stays stable.
- Timed rounds, such as 30 to 45 seconds of continuous controlled reps per side, maintaining band tension throughout.
Summary
Banded Bicycle Crunches take a time-tested core move and add smart resistance by looping a miniband around both feet. That extra tension heightens activation in the Abdominals and Obliques, encourages controlled leg drive, and makes each rep more purposeful. Keep the lower back close to the mat, rotate from the rib cage, and move with a steady breath. Start with a light band and progress gradually. With minimal gear, you can build stronger, more resilient Core muscles that carry over to everyday movement and training.
FAQs
Quick answers help you slot this exercise into your routine with confidence.
Where should the band sit on my feet?
Place the loop evenly around both feet at midfoot or just behind the ball so it lies flat. This reduces rolling and helps the band stay put as you extend each leg.
Which muscles do Banded Bicycle Crunches target most?
Primarily the Abdominals, especially the rectus abdominis, and the Obliques. The Hip Flexors assist during the pedaling action.
How many reps should I do?
Try 2 to 3 sets of 8 to 12 controlled reps per side or timed sets of 20 to 40 seconds, focusing on slow, precise movement and steady breathing.
Is this safe for my lower back?
It can be, if you keep the lower back close to the mat, control your range, and choose appropriate band tension. If your back arches during leg extension, use a lighter band or shorten the range.
What band tension should I start with?
Begin with a light miniband to learn the pattern and maintain posture. Increase resistance as you can keep the same quality of motion.
Why add a band to bicycle crunches?
The band adds constant resistance through the leg drive, increasing difficulty and helping many exercisers maintain better control and tension across reps.