The Single Leg Squat with Support, also known as an assisted single leg squat or supported pistol squat, is a smart way to build one-leg strength and balance without jumping straight into the full pistol variation. It is a strength and balance focused movement with compound mechanics, meaning more than one joint and muscle group share the work. By lightly holding a stable object like a rail, suspension trainer, doorway, rings, or a sturdy post, you can dial up or down how much assistance you use. That makes it perfect for beginners learning control, as well as intermediate lifters polishing technique.
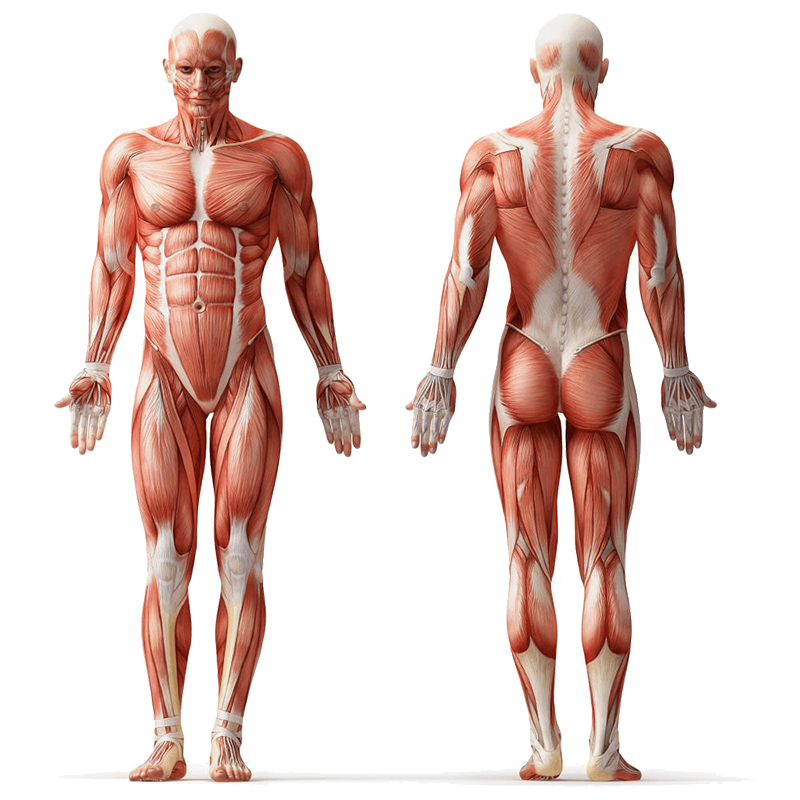
The lead players here are the quadriceps femoris (front thigh), gluteus maximus (buttocks), and hamstrings group including biceps femoris, semitendinosus, and semimembranosus (back of thigh). You will also feel your gluteus medius and minimus (outer hip abductors), gastrocnemius and soleus (calves), and the core muscles like rectus abdominis and obliques working to keep your pelvis and trunk steady. You only need your bodyweight plus a dependable support, and you can progress by slowly reducing how much you hold or pull. This variation shines because you get all the single-leg benefits with far less wobble, making it a solid step toward a full pistol squat.
Safety Considerations
Read this quick checklist so you can train confidently and protect your joints while you practice.
- Warm up your hips, knees, and ankles with 5 to 8 minutes of light movement plus dynamic drills like leg swings, hip circles, ankle rolls, and a few easy two-leg squats.
- Choose a rock-solid support. If you use straps, rings, or a door frame, make sure it is anchored securely and will not move when you apply force.
- Keep a neutral spine and an upright chest. A small forward lean from the hips is fine, but avoid rounding your back.
- Let your knee track over the second toe. If your knee caves inward, reduce depth, slow down, and use a bit more support while you learn alignment.
- Control the tempo. Aim for a slow descent and a smooth push back to standing rather than dropping quickly.
- Stop short of pain. Discomfort in the muscles is normal, sharp joint pain is a red flag. Reduce range or switch to an easier regression if needed.
Note: Consult a fitness professional or healthcare provider if you have pre-existing conditions or experience discomfort during the exercise.
Step-by-Step Instructions
Follow these steps closely the first few sessions so your setup and alignment become automatic.
- Stand facing your support and hold it lightly with one or both hands. Plant one foot firmly on the floor and lift the other foot slightly in front of you. Brace your core and set your shoulders down and back.
- Shift your weight fully onto the planted leg. Keep the foot tripod anchored by pressing the heel, the base of the big toe, and the base of the little toe into the ground.
- Inhale as you initiate the descent. Push your hips back a touch while bending the knee and hip of the working leg. Use the support only as much as needed to stay balanced.
- Lower under control until your thigh approaches parallel to the floor or to the deepest pain free depth you can manage while keeping your knee aligned over your toes.
- Pause briefly near the bottom and feel the tension in the glutes and quads. Keep the lifted leg quiet rather than swinging it for momentum.
- Exhale and push the floor away through your heel and midfoot to stand. Imagine driving the knee out in line with the toes as your hip extends. Use as little assistance as you can while keeping great form.
- Finish tall without locking the knee hard. Reset your posture, take another breath, and repeat for the target reps before switching legs.
Tips for Proper Form
These cues help you squeeze more strength and stability from every rep.
- Think knee over second toe. A light resistance band above the knees can give feedback to press the knee outward.
- Keep your ribcage stacked over your pelvis. Brace your core as if you are preparing for a gentle poke to the stomach.
- Move slow on the way down. A 2 to 3 second descent builds control and teaches your body the pattern.
- Use the support for balance, not to yank yourself up. A fingertip touch or loose grip is ideal as you get stronger.
- Anchor your big toe and heel. If your weight drifts to the toes, your heel may lift and your knee may slide forward too far.
- Adjust depth to your mobility. Reach only as low as you can maintain alignment and a neutral spine.
- Film a set or use a mirror to check knee tracking, hip drop, and trunk angle.
- If your hip drops on the non working side, think about lifting that hip slightly to keep the pelvis level.
Common Mistakes to Avoid
Steer clear of these errors so your practice stays productive and joint friendly.
- Over pulling on the support. It turns a leg exercise into an upper body pull and hides weaknesses. Lighten the grip as your balance improves.
- Knee collapsing inward. This can irritate the knee. Widen your stance a hair, press the knee out, and reduce depth until you can control it.
- Letting the heel pop up. Keep the heel grounded to protect your knee and load the glutes properly.
- Dropping fast into the bottom. A fast descent makes it hard to control alignment. Slow it down and pause near the bottom.
- Rounding the back. Keep your chest lifted and hinge from the hips instead of curving your spine.
- Reaching for excessive depth before you are ready. Meet your current mobility and strength level, then build range gradually.
- Letting the free leg swing. Keep it quiet so it does not throw you off balance.
Primary Benefits
Here is what you can expect when you practice this exercise consistently.
- Builds unilateral lower body strength in the quadriceps femoris and gluteus maximus while training stabilizers like gluteus medius and minimus.
- Improves balance, coordination, and proprioception thanks to the single leg stance.
- Enhances pelvic and trunk stability by engaging the core and deep hip muscles.
- Helps correct side to side imbalances that can show up in running, field sports, and daily activities.
- Teaches clean knee tracking and hip control that carry over to lunges, step ups, and full pistol squats.
- Scales easily by increasing or decreasing how much you use your hands, making it safe for a wide range of fitness levels.
- Requires minimal space and equipment so it fits home workouts or crowded gyms.
Regressions
Pick one of these easier options if you need to reduce difficulty while keeping perfect form.
- Partial range single leg squat with support. Lower only a few inches while maintaining alignment.
- Box or bench assisted single leg squat. Touch your glutes to a high box then stand, using support for balance.
- Two hand support. Hold with both hands and gradually shift to one hand as you improve.
- Counterbalanced assisted squat. Hold a light plate or dumbbell out in front while using support to improve balance.
- Heel elevated assisted squat. Place a small wedge or plate under the heel to reduce ankle mobility demands.
- Tempo holds. Use a very slow descent and 1 to 2 second pauses at mid depth to learn control with less range.
- Split squat or Bulgarian split squat. Both legs share the work while you practice hip and knee alignment.
Progressions
When technique feels smooth and you can control the bottom position, move up the ladder with these ideas.
- Reduce assistance to a fingertip touch, then one hand only, then barely brushing the support.
- Eccentric focus. Lower on one leg for 3 to 5 seconds and use both legs or a bit more assistance to stand.
- Unsupported single leg squat to box. Remove the support but squat to a box to control depth.
- Full pistol squat. No support and full depth while keeping knee over toes and a stable trunk.
- Weighted assisted single leg squat. Hold a kettlebell or dumbbells while still using light support.
- Low box or deficit pistol. Reduce the box height over time or stand on a small platform to challenge range.
- Unstable surface challenge. Stand on a foam pad only when your baseline control is excellent.
Summary
The Single Leg Squat with Support blends strength, balance, and joint control in a way that is accessible to most lifters. By using a stable object for light assistance, you can groove clean knee tracking, build glute and quad strength, and gradually progress toward a full pistol squat. Keep the heel grounded, guide the knee over the toes, move slowly, and reduce your reliance on the support as your technique and strength improve.
FAQs
Quick answers to the most common questions so you can practice with clarity.
What muscles does the Single Leg Squat with Support work?
Primarily the quadriceps femoris and gluteus maximus, with help from the hamstrings, gluteus medius and minimus, calves, and the core for stability.
How low should I go?
Lower to the deepest pain free depth where you can keep your knee tracking over your toes and your heel down. Increase depth gradually as mobility and control improve.
How often can I train this exercise?
Two to three sessions per week works well for most people. Allow at least one day between sessions for recovery.
How many sets and reps are best for learning?
Start with 2 to 3 sets of 5 to 8 controlled reps per leg. Pause at the bottom for a second to reinforce stability.
What equipment do I need?
Any solid support such as a rail, suspension trainer, rings, or a door frame. Optional extras include a box or bench, a small heel wedge, and a light weight for counterbalance.
Is this exercise good for beginners?
Yes. Because you can scale assistance, it is beginner friendly while still challenging enough for intermediate trainees who want cleaner form.
How do I know when to remove the support?
When you can complete your sets with smooth control, good alignment, and minimal hand assistance, start using just a fingertip touch or progress to a box squat without support.