The Stability Ball Single-Leg Wall Squat, also known as the Swiss Ball Single-Leg Wall Squat, blends balance, strength, and control into one smooth movement. It is a lower body strength exercise with a strong balance and stability component, and it uses a compound pattern that challenges multiple joints at once. You will use a stability ball pinned gently between your back and a wall, then squat on one leg while the ball guides your path. This setup helps you groove a clean squat pattern while dialing up demand on key muscles.
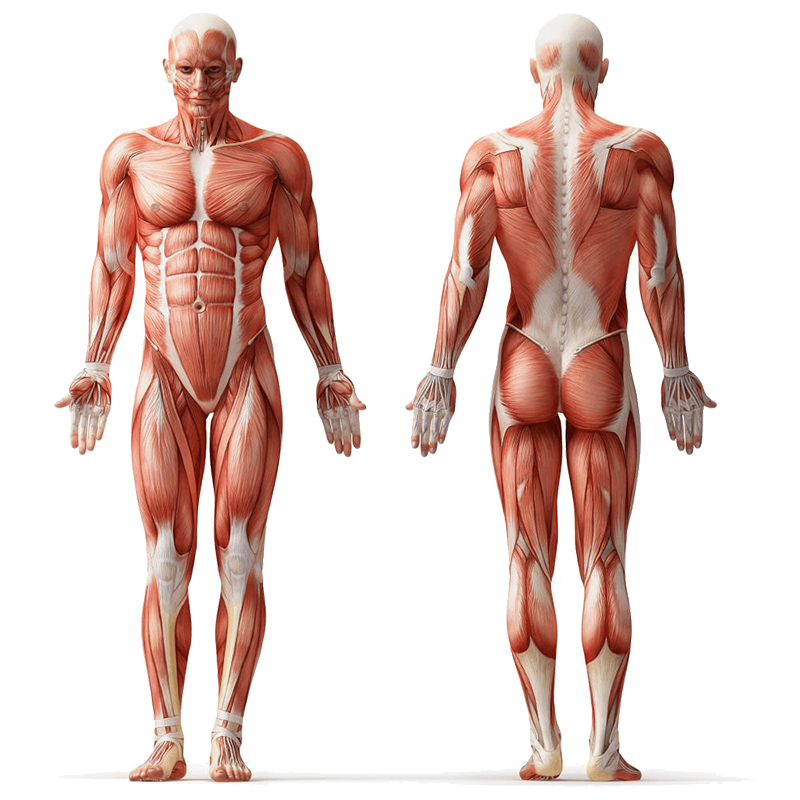
The primary drivers are the Quadriceps (quads, especially vastus medialis and rectus femoris), Gluteus Maximus and Gluteus Medius (glutes), and Hamstrings. You will also feel important support from the Calves and your Core, including the Abdominals, Obliques, and the Erector Spinae that help you maintain posture. The only equipment you need is a stability ball and a wall.
Most people will find this best suited to intermediate exercisers, though confident beginners with good balance can regress it and advanced lifters can load it. What makes this variation special is how the ball assists your back while focusing strength and control into a single stance, which can be easier on the spine and more knee friendly than some free standing single-leg options when performed with good form.
Safety Considerations
Read this quick safety briefing first so you set up smartly, feel confident, and keep your joints happy from your first rep.
- Choose the right ball size: Pick a stability ball that lets the ball contact your mid to low back when you stand tall. Hips and knees should be comfortable with feet slightly in front of you.
- Clear space and stable footwear: Work near a clear wall with non-slip shoes. If flooring is slick, place a mat under your feet for traction.
- Warm up the hips, knees, and ankles: Use 5 to 8 minutes of light cycling or brisk walking, then add dynamic moves like leg swings, ankle circles, and bodyweight wall squats to get synovial fluid moving.
- Spine position matters: Keep a neutral spine with ribs stacked over pelvis. The ball should roll along your back as you descend without forcing your low back to arch.
- Knee tracking: On the working leg, track the knee in line with the second toe. Avoid the knee caving inward to protect the hip, knee, and ankle.
- Range of motion honors control: Only squat as deep as you can keep your heel down, your pelvis level, and your knee tracking cleanly.
- Breathing for stability: Inhale to prepare at the top, exhale through the effort as you stand to engage the core and protect the spine.
Note: Consult a fitness professional or healthcare provider if you have pre-existing conditions or experience discomfort during the exercise.
Step-by-Step Instructions
Follow these steps slowly the first few times to build a smooth, consistent groove that you can repeat every session.
- Set the ball and stance: Place the stability ball between your mid to low back and the wall. Stand tall with your feet about hip to shoulder width and step them 6 to 12 inches forward so your shins are not vertical at the top. Keep your Core lightly braced and your chest relaxed.
- Find your working leg: Shift your weight onto one foot. Lift the opposite foot slightly off the floor by bending the hip and knee a bit. Keep your pelvis level and your hips square to the wall.
- Initiate the descent: Inhale. Sit your hips down and back on the working side while gently pressing your back into the ball. Let the ball roll up your back as you descend.
- Track the knee and keep the heel grounded: Guide the working knee over the second toe and maintain a tripod foot contact through heel, base of big toe, and base of little toe. Avoid letting the arch collapse.
- Depth control: Lower until your thigh on the working leg is about parallel to the floor or the deepest point where you can keep balance, a level pelvis, and a neutral spine. Pause briefly to eliminate bounce.
- Drive to stand: Exhale and press through the heel and midfoot of the working leg to stand. Think about driving the floor away while squeezing the glutes to finish tall without hyperextending the lower back.
- Reset and repeat: Stabilize at the top, maintain quiet hips, then perform the next rep. Complete all reps on one side before switching, or alternate sides if balance demands a reset.
- Repetitions and tempo: Use a 2 to 3 second descent, 1 second pause, and a smooth 1 to 2 second ascent. Aim for 8 to 12 reps per side for 2 to 4 sets, resting 60 to 90 seconds between sets.
Tips for Proper Form
These cues keep your technique crisp so you build strength where you want it and keep stress in the safe zones.
- Keep the ball on your mid to low back rather than your upper back to stay neutral and avoid shrugging the shoulders.
- Pretend your pelvis is a bowl of water. Do not spill to either side. Level hips protect the lower back and keep the Gluteus Medius engaged.
- Imagine screwing the foot into the floor to create external rotation torque. This helps the knee track in line with the second toe.
- Maintain light Core tension throughout. A quiet ribcage stacked over the pelvis keeps your Erector Spinae and Abdominals doing the right amount of work.
- Keep the non-working leg quiet. Do not swing it for balance. A slight knee bend with the toes pointing forward works best.
- Stop a rep early if your heel wants to lift or your knee drifts inward. Quality beats depth every time.
- Use your breath as a metronome. Inhale on the way down, exhale on the way up to organize your trunk and timing.
Common Mistakes to Avoid
Steer clear of these pitfalls so your knees, hips, and back thank you tomorrow.
- Letting the working knee collapse inward, which stresses the knee and robs the glutes of work.
- Standing too close to the wall so the shins stay vertical and the heels lift early. Step a bit forward to keep heels down.
- Dropping the pelvis toward the non-working side, which twists the lower back. Keep the pelvis level.
- Arching the lower back to push into the ball. Maintain a neutral spine and gentle pressure instead.
- Going too fast, bouncing out of the bottom. Control the descent and pause briefly before standing.
- Reaching too deep before you have balance. Own a smaller range first, then deepen with control.
- Holding your breath the whole time. Use smooth, regular breathing to support stability.
Primary Benefits
Here is what you can expect to gain when you practice this consistently and with good form.
- Strengthens the Quadriceps and Glutes for better squatting power in daily life and sports.
- Builds single-leg stability and balance for safer stair climbing, running, and change of direction.
- Engages Core musculature for improved trunk control and upright posture.
- Offers a guided path that can be more comfortable for the lower back than free standing single-leg squats.
- Teaches clean knee tracking to support knee health and comfort under load.
- Improves hip control through Gluteus Medius and external rotator activation.
- Scales easily with tempo, partial range, added load, or reduced support, making it a versatile progression tool.
Regressions
If this feels a bit spicy right now, try one of these easier setups to build skill before returning to the full version.
- Two-leg stability ball wall squat: Perform the movement with both feet down to learn the path and pressure against the ball.
- Assisted single-leg with fingertip support: Lightly touch a dowel or the wall with the free hand for balance.
- Reduced range single-leg: Limit depth to a comfortable quarter or half squat while maintaining perfect tracking.
- Box tap single-leg: Place a box or bench behind you and gently tap it at a shallow depth to standardize range.
- Slow eccentric, two-leg concentric: Lower on one leg for 3 to 4 seconds, then place the other foot down to stand.
- Mini band above knees, two-leg: Use a light band and two legs to cue knees out and build awareness before removing assistance.
Progressions
Ready for a bigger challenge or more strength stimulus? Level up with these options.
- Goblet load: Hold a dumbbell or kettlebell in front of your chest while maintaining the same technique.
- Tempo emphasis: Use a 4 to 5 second descent with a 2 second pause at the bottom before standing.
- Pulses near bottom: Add 2 to 3 small pulses at the lowest quality depth to increase time under tension.
- Unstable foot variation: Place the working foot on a foam pad to increase proprioceptive demand while keeping depth conservative.
- Heavier external load: Hold two dumbbells at your sides once you can maintain clean tracking.
- Contralateral reach: Reach the opposite arm forward at the bottom to challenge anti-rotation control, then return to neutral as you stand.
Summary
The Stability Ball Single-Leg Wall Squat is a smart, joint-friendly way to develop lower body strength, balance, and control using only a wall and a stability ball. It targets the Quadriceps and Glutes while engaging the Hamstrings, Calves, and Core to steady the trunk. The ball guides your path so you can focus on single-leg alignment, knee tracking, and tempo. Start with an appropriate regression if needed, then progress with load, tempo, or range as your control improves. Keep your heel grounded, pelvis level, and breathing steady so every rep builds strong, resilient legs.
FAQs
Scan these quick answers to common questions so you know how to plan, progress, and troubleshoot.
How often should I perform Stability Ball Single-Leg Wall Squats?
Two to three sessions per week with at least one day of rest between sessions works well for most people. Start with 2 to 3 sets per side and increase volume gradually.
Where should the ball sit on my back?
Position the ball on your mid to low back. Too high encourages shrugging and arching. Too low may pinch the hips. Adjust so the descent feels smooth and supported.
What if my knee hurts during the movement?
Reduce range of motion, check that your knee tracks over the second toe, and keep the heel down. If pain persists, regress to the two-leg version or consult a professional.
Can beginners try this exercise?
Yes, but start with the two-leg wall squat using the ball, then try assisted single-leg versions before removing support. Quality movement comes before depth or load.
How do I add intensity without heavy weights?
Use slower tempos, add a pause at the bottom, increase repetitions, or perform pulses. These changes increase time under tension and challenge control.
Which muscles should I feel working the most?
Primarily the Quadriceps and Gluteus Maximus, with assistance from the Hamstrings, Calves, and Core muscles that stabilize your trunk.
Is this good for people with back sensitivity?
Many find the ball-supported path comfortable because it encourages upright posture and even pressure across the back. Stay within a pain free range and keep the core engaged.